In This Section
- Home
- About
- Support
- DMIS – User Manual - 2019
- DMIS – How to View DSS Information
- DMIS - Virtual App
- Support & Login
- Getting Started
- Overview
- Maintain Department Preferences
- Setting up Module Structure
- Module Structure – Mark X Weight
- Virtual App DMIS Mark Entering/Import
- Entering Placement Judgements
- Recording Student Absences
- Recording Students who FAIL a SPECIAL REQUIREMENT
- Break code on a module
- Upload Module Marks to ITS
- Virtual App Report Download
- Common Support Queries
- Support & Login
- ITS
- Reporting Services
- DMIS Login on Virtual App
- Student Headcount Summary
- Contact
- ITS Upgrade v4.1 - Feb 2023
- Reporting Services
Login
- To Access DMIS, the user must follow the steps below:
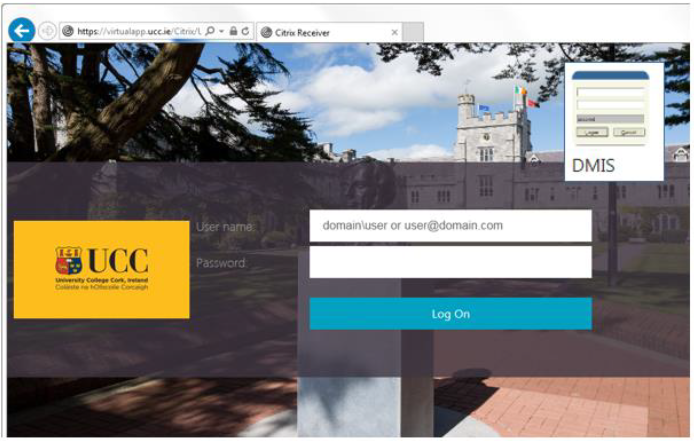
Step 1: Go to the UCC Virtual App and login with your UCC Email Account Details. https://virtualapp.ucc.ie
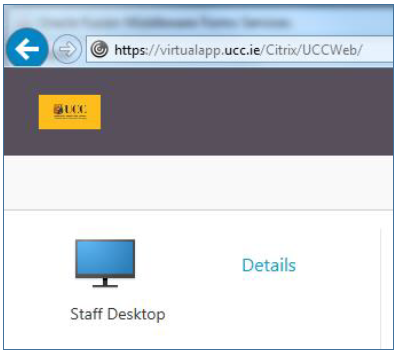
Step 2: A successful login to the UCC Virtual App, will present the user with a Staff Desktop icon.
Step 3: DMIS is accessed through the Staff Desktop.
Step 4: An Icon for DMIS will be present on the Virtual App Desktop
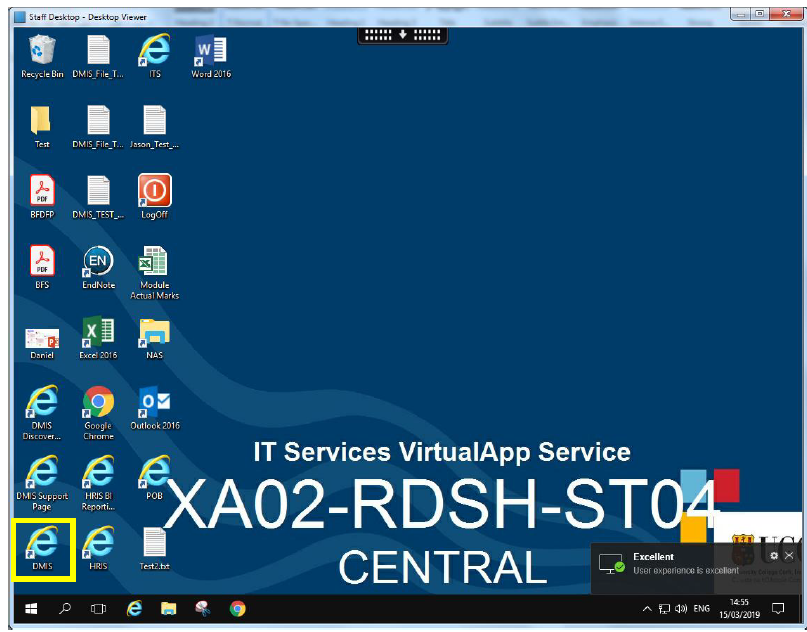
Step 5: Double clicking on the DMIS Icon will launch the DMIS Application.
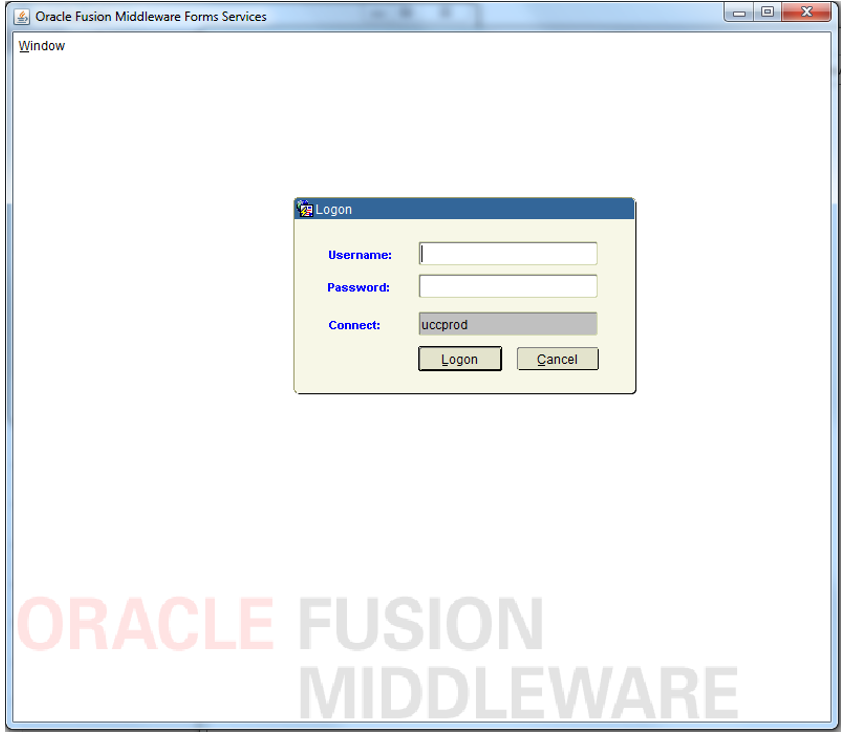
- The Systems Administration Office supplies the usernames and passwords - more info here.
- The ‘Connect:’ field can be ignored as this signifies the DMIS database that you are connecting to and always defaults to uccprod.
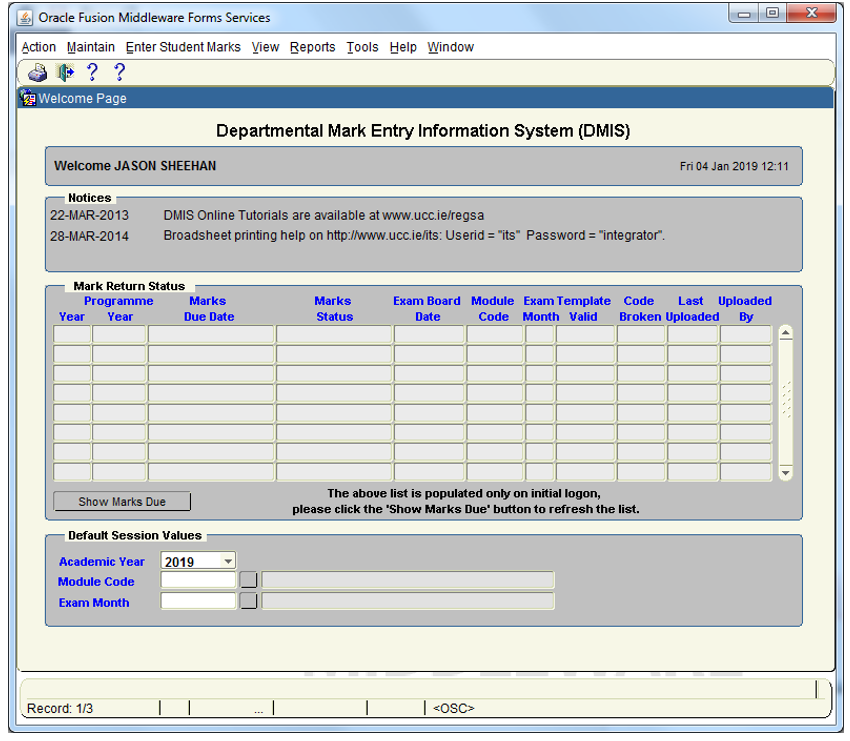
- After successfully logging in the following Welcome Screen is displayed;
General Functionality
- The general look and feel of the DMIS application is consistent across all screens.
- Display only fields have a grey background and black text.
- Updateable fields have a white background and black text.
- Any field that has the following button/icon beside it will have a list of values available by clicking on the button/icon.
- The Academic Year, Module Code and Exam Month parameters are used extensively in the DMIS system as criteria to be entered.
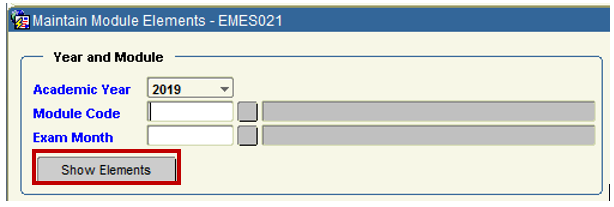
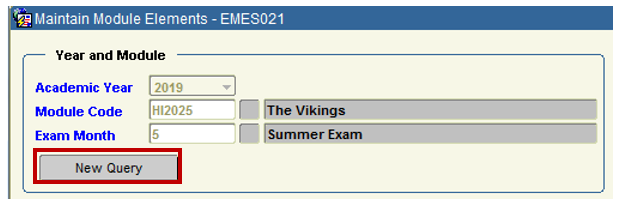
- In many screens there are buttons that have a dual purpose. They can be used to retrieve information and then to clear information for a new query. For example in the Maintain Elements/Module Structure screen there is a button labelled ‘Show Elements’. As soon as the user enters the criteria (Academic Year, Module Code, and Exam Month) and selects this button the elements are retrieved but the button’s properties also change – specifically the label changes to ‘New Query’ and when the user now selects the button it clears the previous data.
-
Example:
Before entering the Module Code and Month, and running the query, the button = Show Elements.
-
After running the query, the same button now = New Query
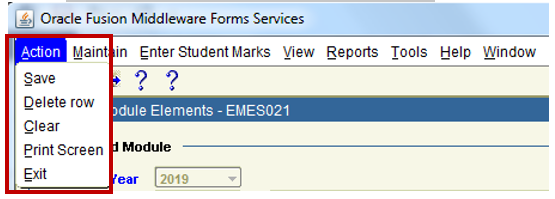
- The Action menu contains key functions for the user.
-
Save: Save will save any changes on the screen to the database.
-
Delete Row: This option is not always available but in some cases allows the user to delete a record. For example in the Maintain Department Preferences the department administrator can highlight a Department Administrator and then select Action> Delete Row to delete the administrator.
-
Clear: When available this allows the user to clear the screen for a new query.
-
Print Screen: This option allows the user to print the screen.
-
Exit: This option will return the user to the welcome screen (after checking if there are any changes to save). If the user is in the Welcome screen, selecting ‘exit’ will exit the application.
Welcome Screen & Session Default Values
- The welcome screen is the first screen that the user sees after logging in successfully.
This screen simply displays the full user name and date.
Any system notifications that were generated by the Registrar’s office are also displayed for information. - In addition the user has the option of setting the session defaults from this screen. The session defaults allow the user to set that Academic Year, Module Code, and Exam Month. These values are then copied and used as the default selection values for subsequent screens. This just saves the user from retyping the session information
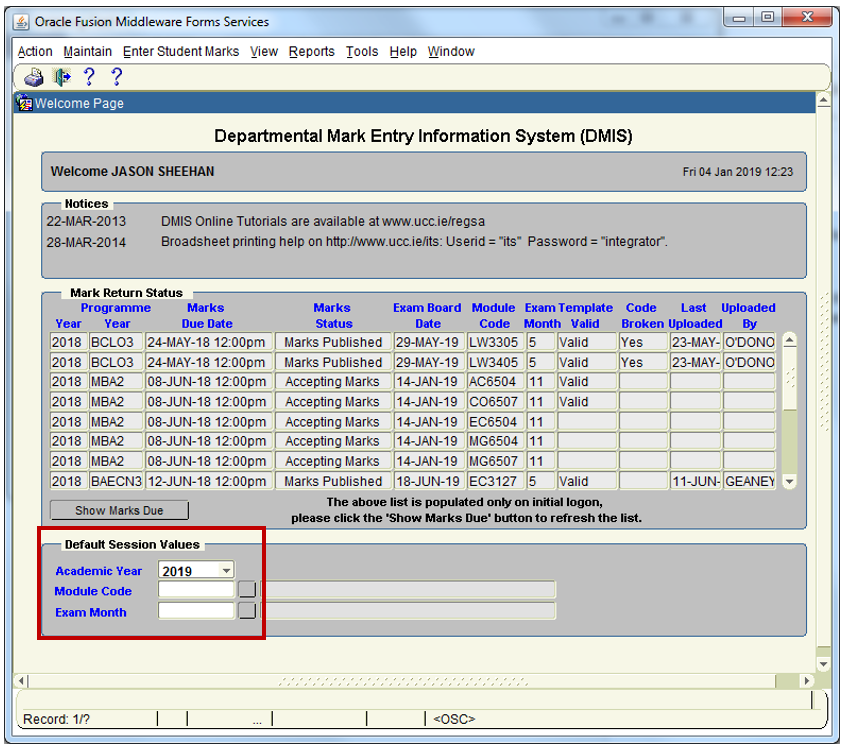
- The Welcome Screen contains important information in the Marks Due Date field, regarding the Date & Time when your Module Exam Marks must be recorded in DMIS and Uploaded to the ITS Student Records System.
Example: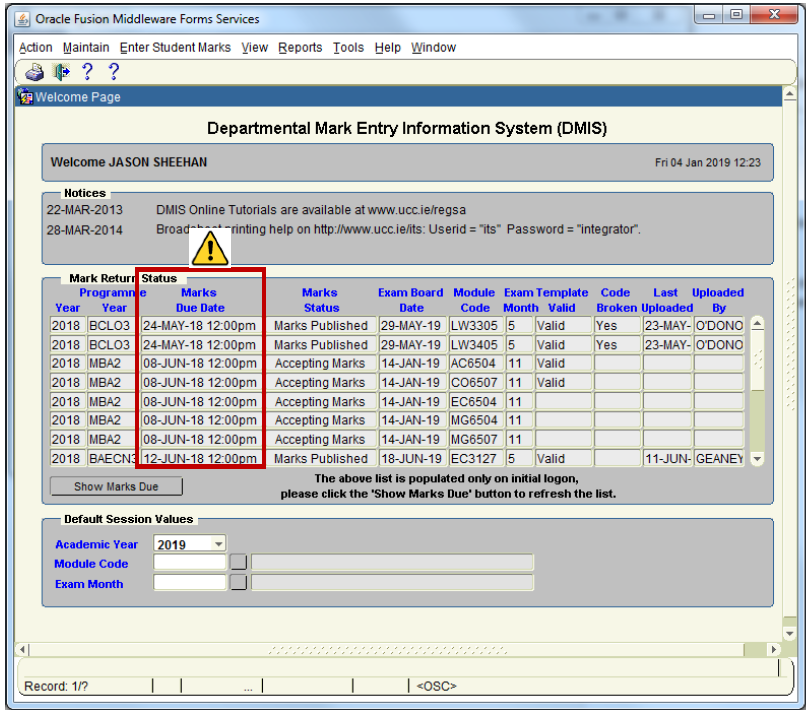
Menu Navigation & Functionality Map
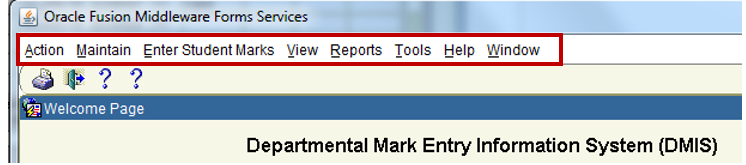
- To access DMIS Screens, use the Menu options at the top of the screen:
- The Functionality Map outlined below gives an overview of where the different DMIS Screens are located, and which Menu needs to be selected in order to locate a specific screen:

Academic Systems Administration Office
Contact us
2nd Floor, West Wing, Main Quadrangle, University College Cork (UCC), Western Road, Cork