- Home
- About
- Support
- DMIS – User Manual - 2019
- DMIS – How to View DSS Information
- DMIS - Virtual App
- Support & Login
- Getting Started
- Overview
- Maintain Department Preferences
- Setting up Module Structure
- Module Structure – Mark X Weight
- Virtual App DMIS Mark Entering/Import
- Entering Placement Judgements
- Recording Student Absences
- Recording Students who FAIL a SPECIAL REQUIREMENT
- Break code on a module
- Upload Module Marks to ITS
- Virtual App Report Download
- Common Support Queries
- Support & Login
- ITS
- Reporting Services
- DMIS Login on Virtual App
- Student Headcount Summary
- Contact
- ITS Jaspersoft Reports
- ITS Upgrade v4.1 - Feb 2023
Module Structure - Examples
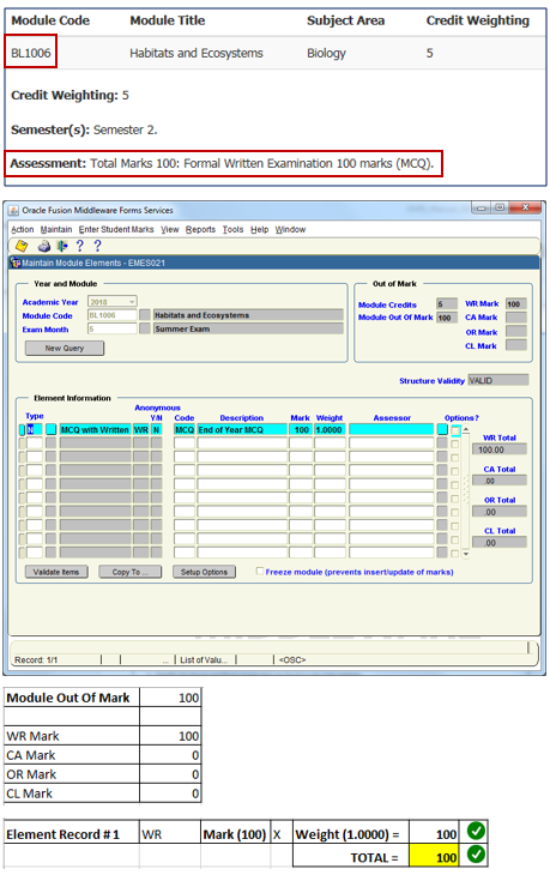
Module Structure - Example 1 - WR
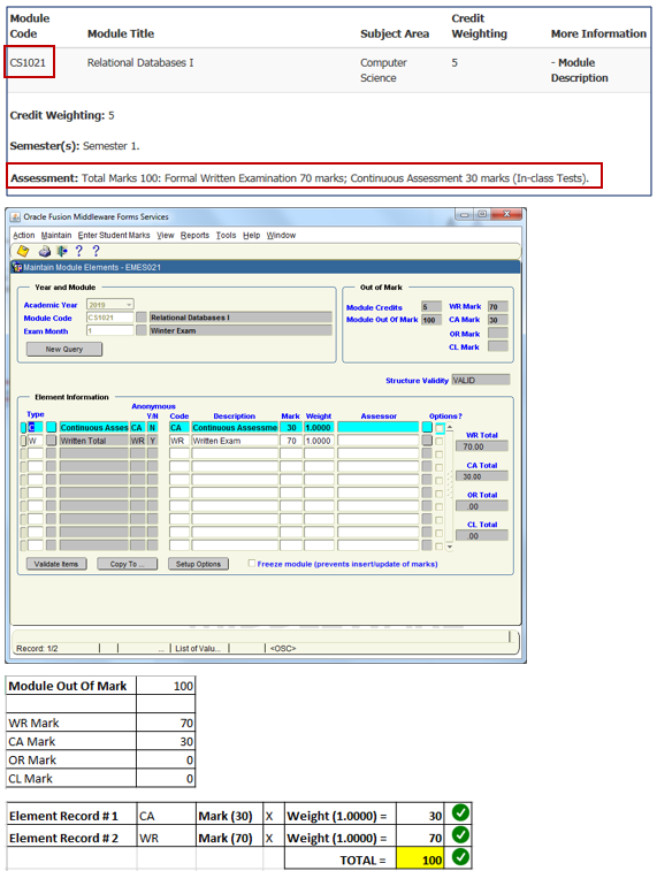
Module Structure - Example 2 – WR + CA
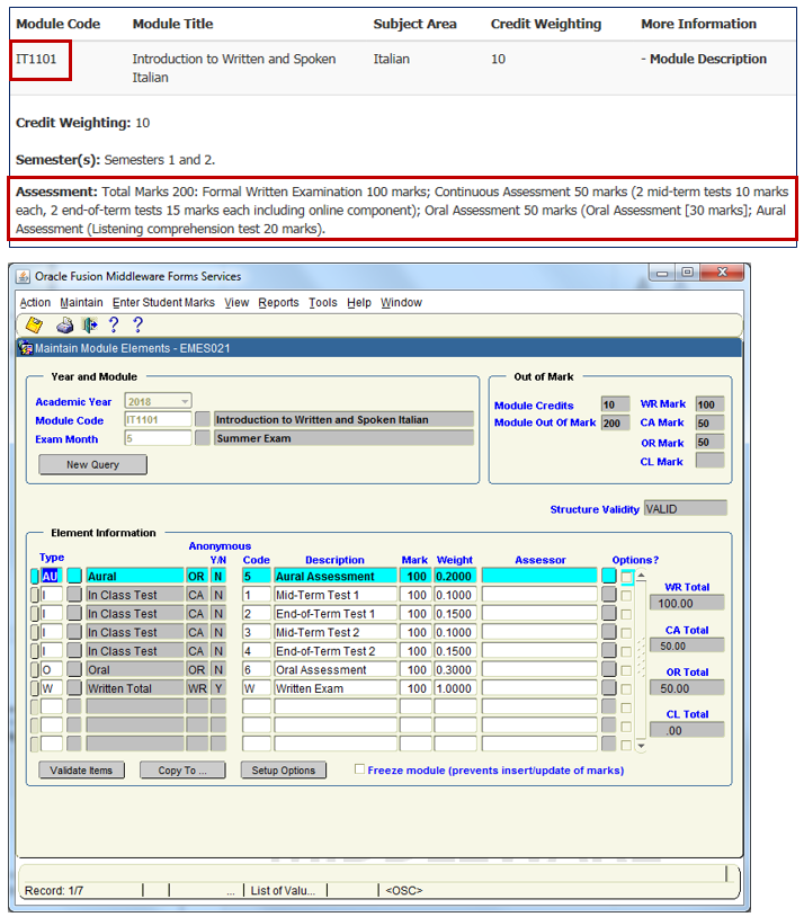
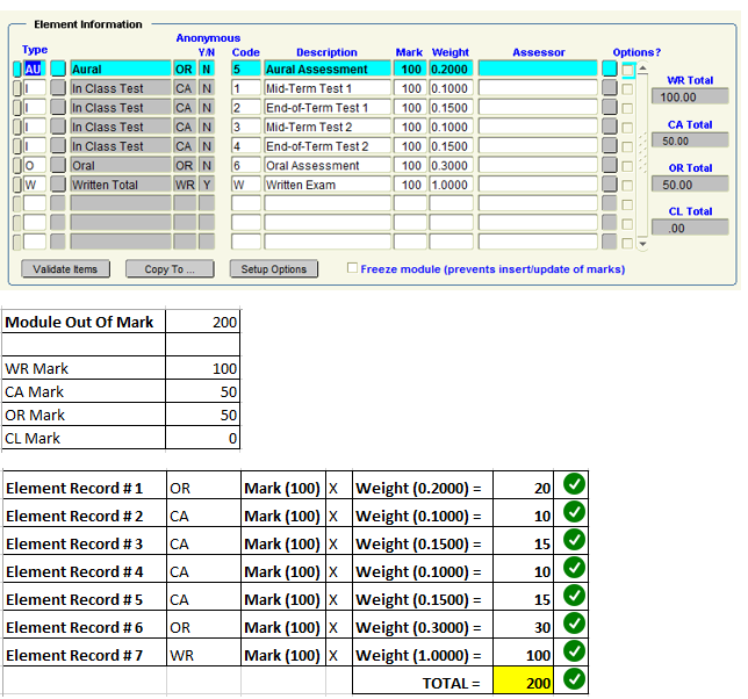
Module Structure - Example 3 – WR + CA + OR
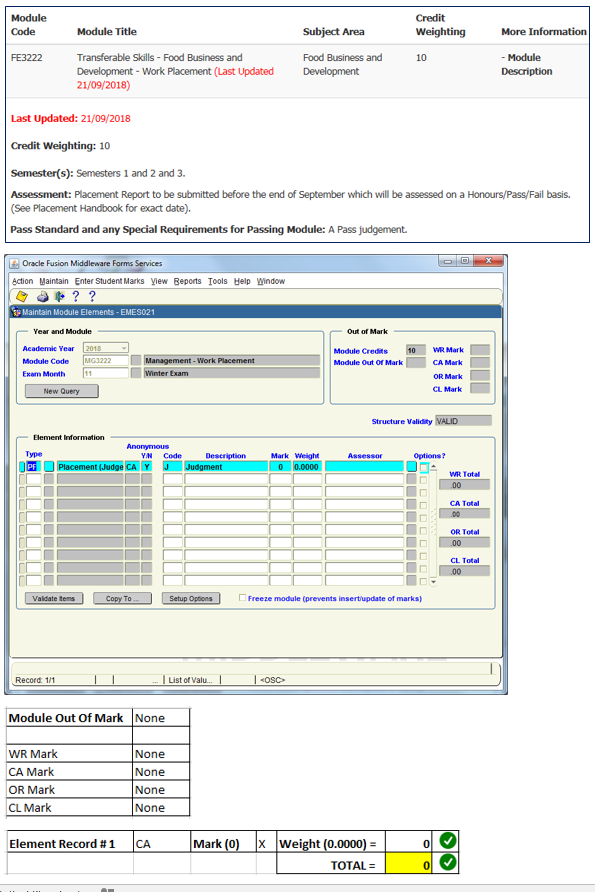
Module Structure - Example 4 – Placement Judgement
Module Structure - Example 5 – Setup Optional Elements
This option allows the user to create optional elements.
Example:
If the Exam Paper had 4 Questions, and the student only needed to answer 2 of the 4 Questions, then you can enter marks which specifically record which questions the student answered.
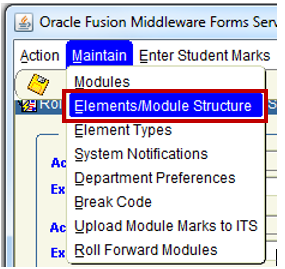
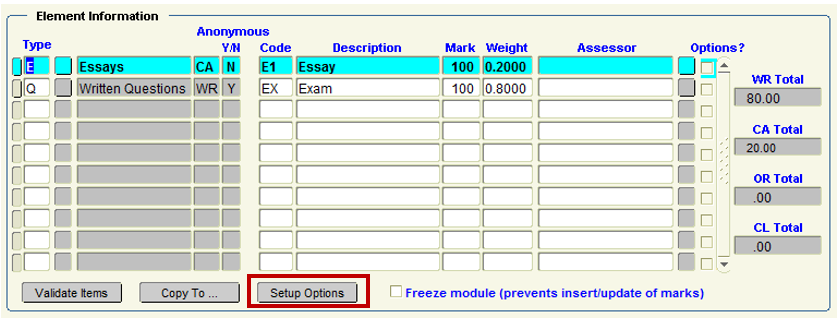
This option is available from the Setup Options button on the Maintain Elements/Module Structure screen.
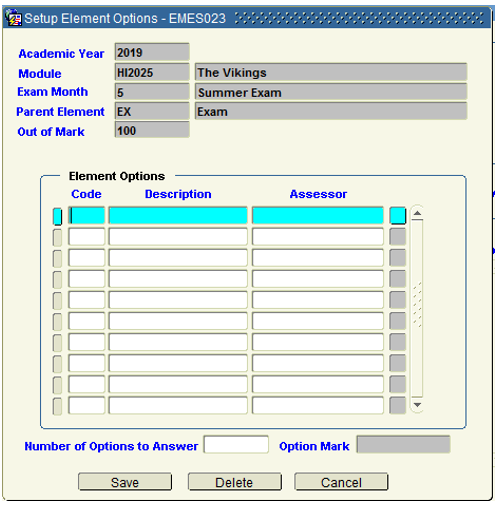
When the user clicks the button the following popup is displayed.
Example:
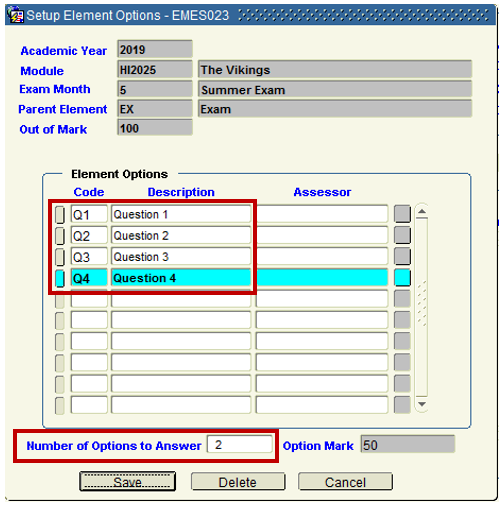
I record 4 Questions, but indicate that the Number of Options to Answer = 2
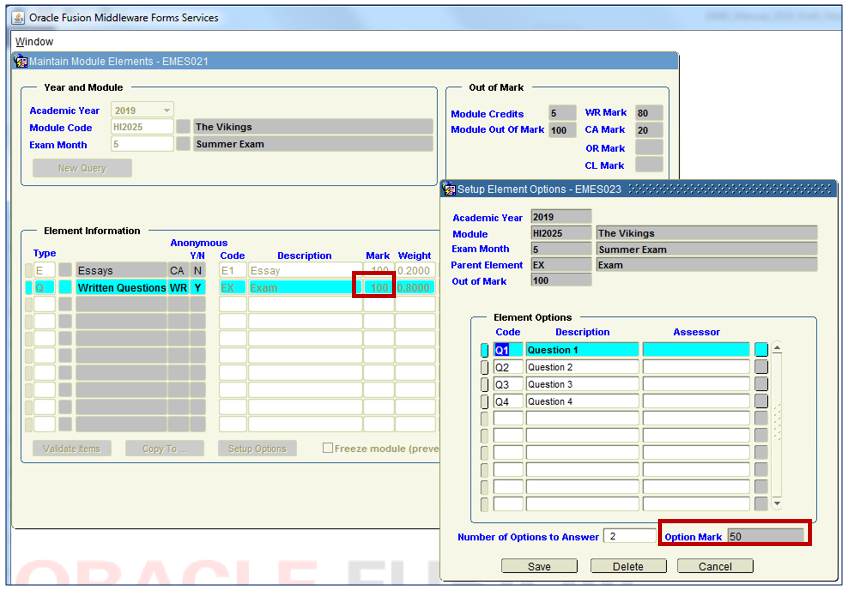
Because I have specified that my WR Element Mark = 100, DMIS will automatically set the Option Mark field to indicate that each of the 2 Questions carries EQUAL Marks = 50 Marks Each.
I.e. – 100 Marks / 2 Questions = 50 Marks Each.
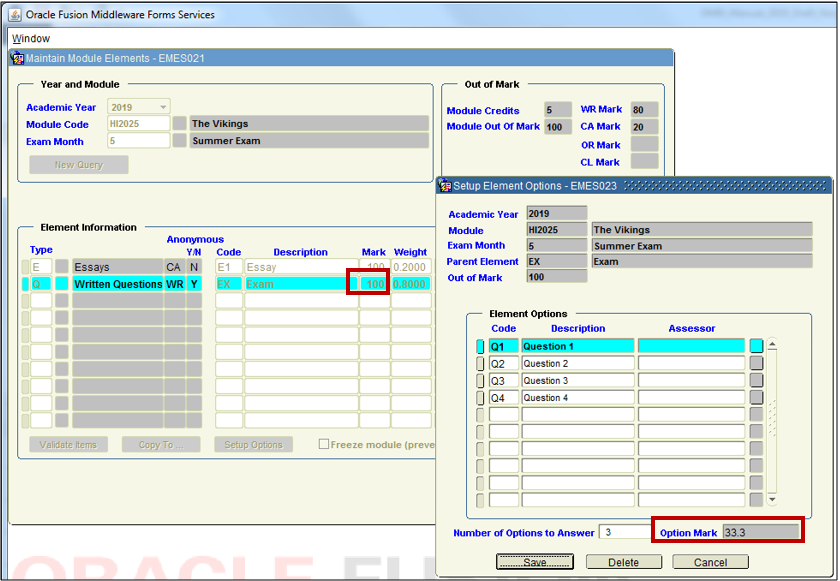
If I wanted the Student to Answer 3 out of 4 Questions, I when I set the Number of Options to Answer Field = 3, then DMIS will automatically set the Option Mark Field = 33.3
I.e. – 100 Marks / 3 Questions = 33.3 Marks Each.
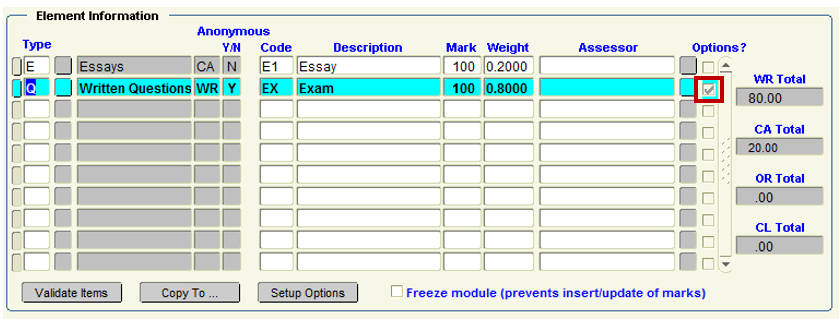
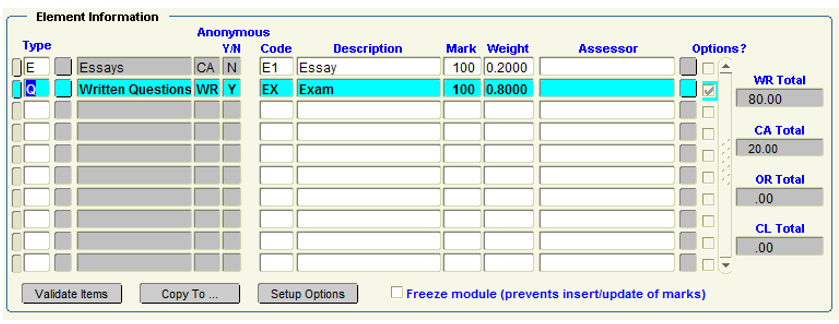
The Element Information Section will show a Tick in the Options Field if there are Options recorded against an Element.
Example:
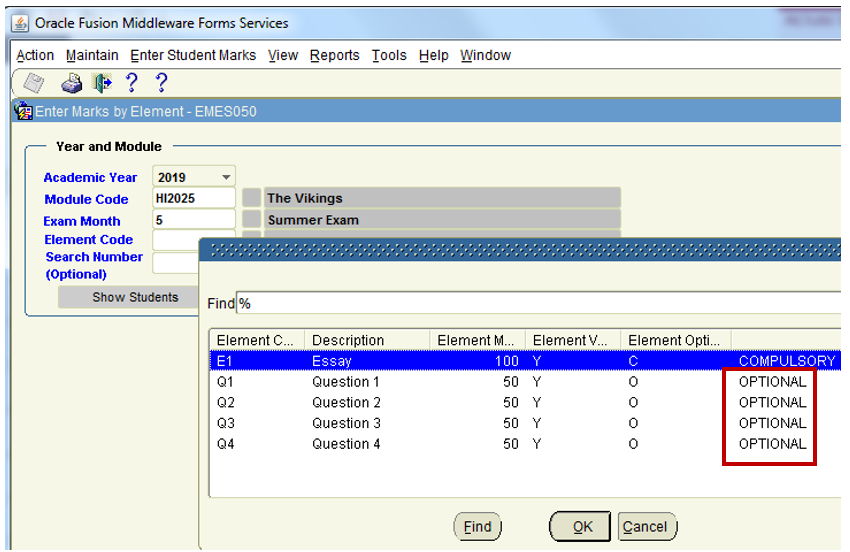
When you then move onto the Entering of Marks, an Element with Options, will no longer be presented as an Element Code to selected and enter marks against.
Instead the Option Records will be presented.
In the Example below, the Written Questions – EX – Exam is not presented to me when I am entering Marks.
Instead, the 4 Option Elements are presented:
Question 1
Question 2
Question 3
Question 4
These Element Options are flagged as OPTIONAL.
I.e. – You do not need to record Marks against all 4 Questions, just the number you specified in the Options setup.
In Summary, to setup Optional Elements, carry out the following actions:
Step 1: Create the parent element on the Maintain Element/module Structure screen.
Step 2: Highlight the parent element and click ‘Setup Options’ button.
This will display the element options screen.
Step 3: Enter the full set of optional elements.
Step 4: Enter the number of options which should be answered.
Step 5: Select Save.

